
Mapmaker Monday
Setting Up
The pretty much complete guide to playing Timesplitters, downloading and playing maps, and sharing your own maps, all on your computer...

Playing Timesplitters on your PC
The place to start on your way to playing and sharing maps...
Step 1 - Downloading PCSX2 (a PS2 emulator)
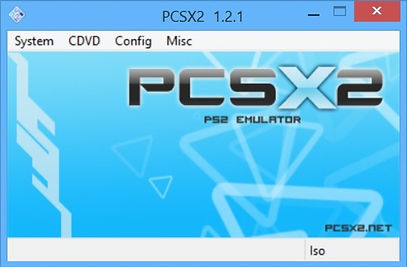
To be able to play the maps made on this site, you must play the PS2 version of Timesplitters Future Perfect, and the easiest way to do that is via PCSX2, a PlayStation 2 emulator for PC, Mac, and Linux. You can find the emulator at it's official website, pcsx2.net. The latest stable build (as of writing this) is 1.4.0, but personally I prefer using the latest nightly build instead (currently at 1.5.0), which you can find HERE. The nightly build may not be the most stable, but its been through almost 2 additional years of updating, which makes Timesplitters in particular run with less graphical glitches. Although they are still present in some forms, you won't run into them if you stick to mapmaker and arcade matches.
Step 2 - Doing first time setup with PCSX2
NOTE: if you are using a Nightly build (which doesn't have an installer), you may need to download and install the most recent version of the Visual C++ redistributable, which can be found HERE.
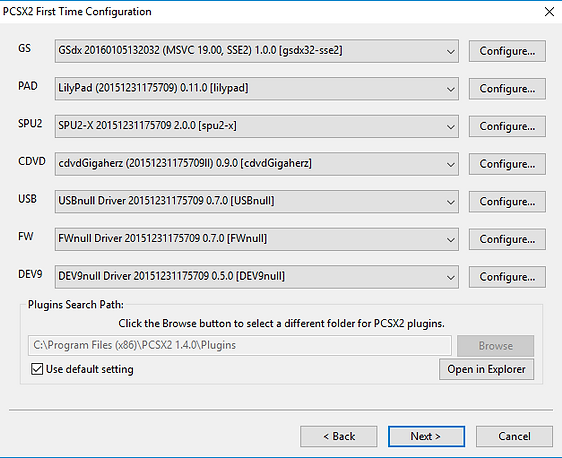
When opening PCSX2 for the first time, you will be greeted with a screen that looks similar (or exactly like) the one pictured on the right. You do not have to mess with any of these options EXCEPT for the very first drop-down. This drop-down menu shows a list of the same plugin, but with different suffixes such as AVX/AVX2 or SSe2. You must choose the plugin that most suits your processor family, with the most recent being AVX/AVX2. To find this out, you can visit HERE and go through each list to find out what fits. A good rule of thumb is that if your CPU was made after 2012, you probably can use the AVX/AVX2 version of the plugin. Once you've found what plugin fits your CPU, you can click next and move on to the next step.
Step 3 - Acquiring a PS2 BIOS
In order for the Emulator to function at all, it needs the backbone of the PlayStation 2, it's BIOS (or the menu that you see before playing a game or messing around with the memory cards). Now there are methods of soft-modding your PS2 and ripping the BIOS to a thumb drive and then converting it to a couple files, but we're gonna ignore all that and just say that Google is your friend here. You can use any BIOS you'd like and not worry about what region a game is from, as PCSX2 is not region locked. The easiest BIOS I could find was Japan v1.000, but if you can find the BIOS for your region, and it's on a later version, I'd recommend that as it will help you in the case of some possible future developments in, let's say, online play?

Step 4 - Setting up your controller
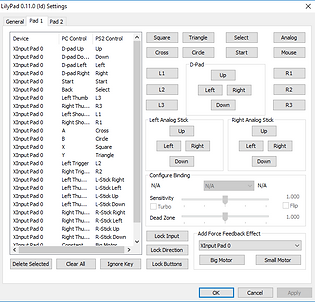
Once you have completed the setup process, you can now customize individual settings. The first thing you wanna do is setup your gamepad by clicking on config>>Controller (pad)>>plugin settings. By default, the program is set up to handle XBOX 360 gamepads, so if you planned on playing that way, mission accomplished, you can not bother with these settings. If you plan on using a Dualshock 3, I recommend you use Better DS3, it's just better... With Dualshock 4, you can use DS4windows or Inputmapper. All of these options emulate the XBOX 360 controller, plus gives you some customization too. Having these programs will also help if you've got some other PC games that need an XBOX 360 controller, but you REALLY wanna use your DS4. If you don't have these options, or there are no default controller settings for some reason, you can select your input device of choice from the pad 1 tab, and setup your device by clicking on the button you want to simulate, and pressing what you want it to be on your gamepad/keyboard (please don't try to play with your keyboard)
Step 5 - Configuring graphics settings for Timesplitters
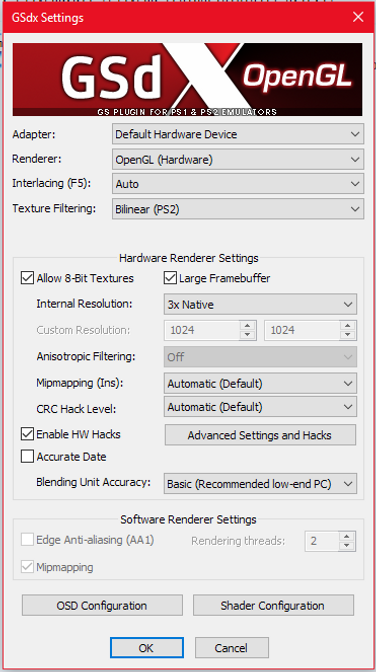
Now lets move on to setting up what Timesplitters will look like by going to config>>Video (GS)>>plugin settings. With this plugin, some options may vary based on what version of PCSX2 you're using. What settings look best, and what may run the best will also vary, depending on your version of PCSX2 and how powerful your CPU and graphics card are. This section will be all about what works best for my PC, as well as some settings that should be on for Timesplitters to look its best. Starting with the renderer, choose what's best for you, but I've seen minimal graphical glitches using OpenGL (Hardware). General rule of thumb is don't use Software unless you want an accurate-looking game that runs horribly. Texture Filtering I set to bilinear, but this is completely your preference. Check "Allow 8-Bit Textures," it doesn't affect performance and increases compatibility. Internal Resolution can be set at "Native" for 480p, "3x Native" for 720p, and "4x Native" for 1080p. I personally use 3x Native because its close enough to 1080p for me, has greater compatibility, and runs better. You can use custom resolution if you want, but setting it to 1920x1080 won't run as well as just setting it to "4x Native" so typically it's not worth it. Check the "Enable HW Hacks" box and click on the "Advanced settings and hacks" button. In the window that opened, check the "Align Sprite" box. This helps make 2D objects like HUD and Menu items look more accurate with no cost to performance. If you plan on playing TSFP's story mode, you should also set "skipdraw" to 1, although if you do this, the menu background will go from blue to grey, and you won't have the visual effect that occurs when you use the ghost gun. That's all of the settings that will help make the game look as accurate as possible. Please note, however, that so far, there is no setting that will prevent a particular effect from occurring at the end of the "Machine Wars" level in the story, making it effectively impossible to complete. Sorry about that!

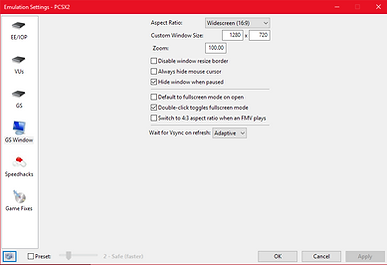
Let's move on to some more basic stuff in config>>emulation settings. On the sidebar, click on the "GS window" icon. Set Aspect Ratio to 16:9 (because Timesplitters can do that, and set the border size to whatever you want, but you'd probably prefer something like 1280x720. Note that this setting does not affect the fullscreen resolution, which will always be your monitor's current resolution in your OS settings. We can close this right now, but if your game is struggling to run, move on to the "Speedhacks" icon. After you uncheck the "Preset" box in the bottom of the window, you can slide two sliders and click some more boxes. The slider on the left changes the PS2's cycle rate. While changing this is useful in games with variable framerates, Timesplitters Future Perfect's gameplay will slow down with the cycle rate, so keep that where it is. The other slider on the right describes itself as "VU cycle stealing," whatever that means. All I know is that if you slide it more to the right, your game gets alittle glitchy, but runs twice as well as it did before. If your game is not running well, move this slider one increment at a time until it runs full speed. Don't move this slider more than you need to, and DO NOT move it to position 3, as your game will run much worse, and look as bad as its running. The only check box to worry about is "MTVU" which claims will give you good speedup if you have more than 3 cores. I haven't experienced this speed up, and have sometimes experienced the game running worse, so your mileage may vary.
Step 6 - Playing Timesplitters Future Perfect
The best thing about PCSX2 is that if you have a copy of Timesplitters Future Perfect lying around, you can pop it into your computer and run it by selecting CDVD>>plugin, then system>>Boot (full) or Boot (fast). Please note: it's recommended that if you haven't run PCSX2 at all yet, that you select Boot (full) and configure your BIOS. After that, you can select Boot (fast) with no worries. If you don't have the game around, you need an ISO of the game, where once again, Google is your friend. After you've found yourself an ISO for Timesplitters Future Perfect, you can go to CDVD>>ISO selector>>browse. Once you've selected your Timesplitters ISO, you can then use system>>Boot (full) or Boot (fast), and enjoy your game. If you're here for just the maps and you don't want to bother with the story or arcade league, I get it. It's a great game that's definitely worth playing at some but, but it takes forever to 100%, so here's a memory card with a 100% complete game save. To learn how to put it in PCSX2, scroll down to the downloading maps section of the page.

Downloading Maps

The thing you came here to do in the first place...
Step 1 - Downloading a map
If you couldn't figure it out on your own, yes, you need to download a map from this website to play it. They come in the form of memory card files for PCSX2, or .ps2 files. Yes, there are ways to download single files off of ps2 memory cards, but A: it's not easy to do, and B: you can't have more than one mapmaker save on a memory card anyways. So this is the method behind the madness. To get your collection started, CLICK HERE to visit the post for the very first map on this website: Stack. You can either download the single map, or download the whole associated map pack. Save whatever memory card you chose to download to "Your chosen directory"\pcsx2 folder\memcards
Step 2 - Putting the Memory Card "In" your "PS2"
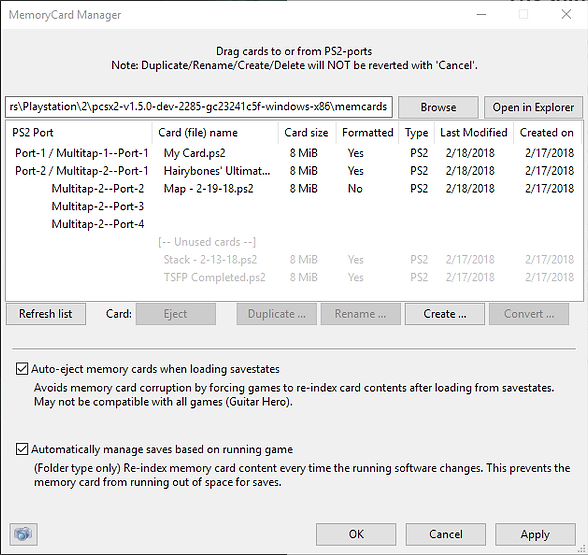
You put the memory card in your memcards folder, but its not "in your ps2" just yet, as you can actually make as many memory cards as you'd like. To put it "in your PS2," go to config>>Memory Cards. Here you will find that PCSX2 graciously provided you with a memory card already in slot one, and if you downloaded a memory card to the memcards folder in your PCSX2 install folder, you'll see it below, greyed out. To insert the card into a memory card, drag the card from the grey area at the bottom into an empty slot. Now in-game and in the PS2 BIOS, the memory card will appear. If you'd like to be able to use more memory cards, up to 8 at once, you can go to config>>Multitap 1/Multitap 2. That will insert a virtual multitap into the respective slot. Inserting a multitap into slot one is also useful for playing four player local multiplayer if you so desire.
Optional - Downloading single maps?
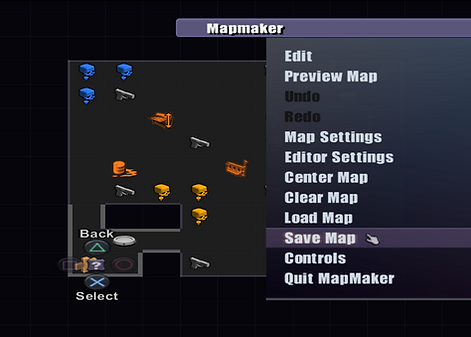
Now that you've inserted the memory card, you're all set to play the map(s) that are found on there in Timesplitters, although its probably really annoying having a bunch of memory cards inserted that all only have one map. What if you wanted all the maps in one place? Well there is a sneaky way of copying maps to other cards. Navigate to the Timesplitters Future Perfect Mapmaker mode and load a map you want to move. Once that is done, enter the mapmaker by selecting "create new/edit map". Once map maker is loaded, you can press start, hit "save map", and select whatever memory card you want it on as well as name it whatever you want. You have now copied the map to your own memory card and can remove the memory card that has the single map on it.

Sharing Your Maps
Time to get your work out to the world...
Step 1 - Saving maps best practices
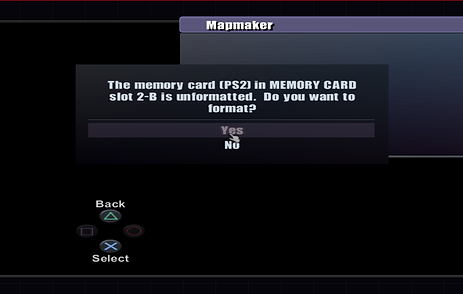
When you are done with your map, it's a good idea to save it to a separate memory card so that others can play the map you meant to share. To do this, go to config>>Memory Cards, make a new memory card with the name of your map, save it, and insert it into your "PS2" by dragging it from the grey area to an empty slot. Then you can format the memory card, name your map, and save it so its all on its own. Now that you have the memory card with the one map on it, its time to find it and share it. As a side note: it's probably a good idea to save your map twice, once on its own, and once in your own personal collection of maps. That way you don't have a bunch of memory cards inserted at all times.
Step 2 - Finding and sharing your maps

The memory card with your map can be found your PCSX2 folder under "memcards". There you can copy your memory card (Don't just move your memory card, especially while PCSX2 is open or else you may damage your save data) to different folder for safekeeping and prepare to upload it. Then you can upload the memory card with your map on it to a website such as Google Drive or Mediafire and copy the link (make sure the file is shareable). After your map is uploaded, you can come here and post it on the "Community Maps" forum. Best practices is that you take screenshots or even a video so people would want to download and play your map.

Playing Online Using Parsec (PC Only)
Go Show 'Em What You're Made Of!
Step 1 - Download and Set Up Parsec

Parsec is software that is designed to allow users to play local multiplayer games on two computers by taking the game being played on one computer and sending a low latency live video feed of the game to whoever you allow. This allows us to emulate TimeSplitters Future Perfect on only one computer and 4 people can play together! Download the client from parsecgaming.com, make sure when you're installing, you install controller support, make an account when it asks, and whoever plans on streaming, make sure they set up their computer. Once you add each other as friends on Parsec, they can ask to connect to the host and you have a connection!
Step 2 - Setting up Multiple Controllers and Multitap
Setting up multiple controllers, to nobody's surprise, should be as simple as setting up your own. Make sure everyone has a controller that's plugged in, for ease of use have a program on their own computer such as DS4windows or Inputmapper so the inputs come in as XBox 360 controller inputs, and one at a time ask them to put in each ps2 controller input. If you are playing with 3 or 4 players, then on the first tab, make sure that either Multitap 1 or Multitap 2 boxes are checked and more controller input tabs will be opened up. For compatibility reasons, if you use a virtual Mutlitap for memory cards, you should use the same Multitap option for controllers. Also be sure that when setting up controller inputs that more than one connected controller does not control one controller, else you'll quickly find complications during gameplay. Replacing individual inputs is as simple as selecting what you want deleted and hitting the delete key.
Step 3 - Play the game!

Once you get all the controllers working, you can play splitscreen arcade and mapmaker with little to no noticable latency! There is obviously the issue of screen peaking with this style of play, but hey, it's multiplayer online timesplitters, all on your PC. Using Parsec, you may need to lower quality settings in both Parsec and PCSX2 order to get the best framerates and the lowest latency, especially if you are running on a lower end PC. Also there's the added detriment that playing this method is PC only; you will not be able to play online with others or stream you real PS2 with this service. Cross-play between PC and PS2 is to be figured out sometime in the future...